Saturday, September 20, 2008

Latest Amsn with Anti-Aliasing

I dont know if they fixed in repositories but if they not

Here is how to install with antialiasing


Download from here the deb package.

In Terminal:

sudo apt-get install tcl8.5 tk8.5


sudo dpkg -i amsn_0.97b_tcltk_8.5.deb


its ready, you can update to latest version with no problem from ubuntu package manager.

Another Fix is to open hotmail with firefox and use Nautilus for Files

Go to Account - Preferences - Other

Change to browser mozilla $url to firefox $url
Change to File Manager to nautilus open $location


Enjoy :)


Read more...

Saturday, August 9, 2008

How to Install SlickneSS One of the Best Theme


To install first download the theme from HERE


Then Right click the file and select extract here

In terminal run these commands:

sudo cp -r $HOME/Desktop/SlicknesS /usr/share/themes


sudo chmod 777 /usr/share/themes/SlicknesS/Slickness.jpg


a firefox Fix:

cp /usr/share/themes/SlicknesS/userChrome.css $HOME/.mozilla/firefox/*.default/chrome


Open the theme manager, now you can see the Slickness theme as a theme when you click on it , it suggests a wallpaper, click apply to apply the wallpaper!

and now the how to the icons, Download from Here

Save the file and right click to extract here copy the folder with icons in ~/.icons then go into System->Prefs->Appearance and Customize the Slickness theme and select icons Tab and then select black-white_style big.

And you are ready!!!

* If $HOME doesnt work for you change it with /home/you username/

* ~ this is you home folder, to view the folder .icons must go to nautilus View Tab and click Show Hidden Files


Read more...

Monday, August 4, 2008

Download youtube videos and convert them to AVI

Download youtube videos and convert them to .avi you just give:

sudo apt-get install youtube-dl ffmpeg


To Download YouTube Video give:

youtube-dl -o example.flv "http://www.youtube.com/watch?v=cdaAWFoWr2c"


and to convert to avi:

ffmpeg -i example.flv example.avi


(of course change the name of the video as you please and the youtube link to the video you want to download).

Enjoy!!!!!


Read more...

Play youtube videos directly in Totem Movie Player


Play youtube videos directly in Totem Movie Player (Hardy):

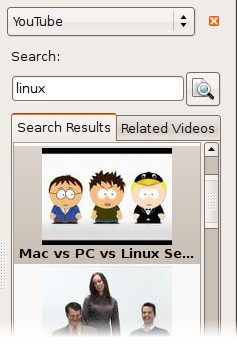
Open Movie Player, go to

Edit > Plugins and enable “Youtube Browser”


then in the right panel select “Youtube” and then just search for a video.

It works with full-screen too :)

Also you can install the Totem Movie Player H.264 plugin for youtube for better quality,

For Gutsy download Here

and extract the files in

/usr/lib/totem/plugins


For Hardy is ready

Deb File.


Enjoy YouTube direct:)


Read more...

A backup Utility -Remastersys- Must Have

Remastersys is a tool that can be used to do 2 things with an existing Klikit or Ubuntu or derivative installation.

1. It can make a full system backup including personal data to a live cd or dvd that you can use anywhere and install.
2. It can make a distributable copy you can share with friends. This will not have any of your personal user data in it.


Just Paste the following into the sources.list:

deb http://www.remastersys.klikit-linux.com/repository remastersys/


in terminal give :

sudo apt-get update


and just install it

sudo apt-get install remastersys


after that you can find it in System - Administrator

you can make a full backup of your ubuntu in ISO and burn it!

if something goes wrong with you ubuntu you just install the dvd like the
original ubuntu distro! but with all your stuff!!!

Its must have software!!!!

Enjoy!!!


Read more...

Sunday, July 27, 2008

Turn Your Ubuntu Hardy to Mac OSX Leopard

There is many steps you have to make, but definitely deserve it.

If you want to change this:

ubuntu-desktop-original into

ubuntu-leopard-screenshot , follow the steps below.

Before we start…

First, create a folder in your Home and name it Mac_files. Download the following files to the Mac_files folder.

Using Archive manager, extract the three Mac4Lin zip files to the Mac_files folder.

Apply Mac OSX Leopard Theme

Go to System->Preferences->Appearance.

appearance

Select Install and select the Mac4Lin GTK theme (/home/username/Mac_files/Mac4Lin_v0.4/GTK Metacity Theme/Mac4Lin_GTK_v0.4.tar.gz).

appearance-select-gtk-theme

Next, click Install again and select the Mac4Lin icon theme. (/home/username/Mac_files/Mac4Lin_Icons_Part2_v0.4.tar.gz). When prompted, select “Apply new themes“.

Click Install again and select the Mac4Lin mouse cursor theme. (/home/username/Mac_files/Mac4Lin_v0.4/GTK Cursor Theme/Mac4Lin_Cursors_v0.4.tar.gz). Select “Apply new themes” when prompted.

appearance-cursor-apply-theme

Click ‘customize’ and choose Mac4Lin_GTK_v0.4. Go to the “Window border” tab, choose Mac4Lin_GTK_v0.4. Click Close.

appearance-customize

On the top, go to the Background tab. Click Add and select the Leopard wallpaper. (/home/username/Mac_files/Wallpapers/Leopard.jpg). Click Close to terminate the Appearance window

appearance-select-wallpaper

Install the Dock (Avant Window Navigator)

Open a terminal (Applications->Accessories->Terminal) and type

gksu gedit /etc/apt/sources.list

and add the following lines to the end of the file:

deb http://ppa.launchpad.net/awn-testing/ubuntu hardy main
deb-src http://ppa.launchpad.net/awn-testing/ubuntu hardy main

Save and close the file. In your terminal, type

sudo apt-get update

sudo apt-get install avant-window-navigator-trunk awn-manager-trunk awn-extras-applets-trunk

Go to System->Preferences->AWN manager. On the left, click on the Theme. On the right, click Add and navigate to the Mac_files folder. Select the Elegant_glass.tgz file. Check the bullet beside the Elegant glass theme and click Apply.

awn-select-theme

Next on the left, click on the Applet icon. On the right, scroll down to the stack Applet. Highlight it, then click Activate. This will add the Mac Leopard stack to your dock.

awn-select-applet

Before you launch the AWN, remove the bottom panel from the desktop first. Right click on the bottom panel and select “delete this panel”. Open AWN via Applications->Accessories->Avant Window Navigator. Once it is activated, you can simply drag and drop the applications into the dock.

Install OSX Fonts

Open a terminal and type the following:

sudo apt-get install msttcorefonts

This will Install the Microsoft core fonts.

Next, copy the OSX fonts to the fonts folder

cd /usr/share/fonts

sudo tar xvzf /home/username/Mac_files/Mac4Lin_v0.4/Fonts/OSX_Fonts.tar.gz

Configure the fonts:

cd/
sudo tar xvjpf /home/username/Mac_files/Mac4Lin_v0.4/Fonts/fontconfig.tbz -C /etc/fonts

Open the Appearance window (System->Preferences->Appearance) and select Fonts tab. Select the following fonts according to the image below. Click Close.

appearance-configure-fonts

Change the traffic light window control to the left

In the terminal, type

gconf-editor

This will bring up the gconf-editor window. Scroll down to App->Metacity->general. On the right, double click on the button_layout and change the content to ‘close,minimize,maximize:menu’ (without the quote). Click Ok and close the gconf-editor.

gconf-editor

gconf-editor2

Change the menubar

Remove all the icon and applications on the left side of the top panel. Right-click on the icon and select ‘Remove from panel‘. You will left with something like this:

menubar-remove-icon

On the right of the top panel, remove the logout icon. Still on the right hand side of the top panel, right click and select ‘Add to panel‘. Scroll down the list and add ‘Search for files‘. This will add the spotlight icon to the panel.

menubar-add-search

On the extreme left, right-click and select ‘Add to panel‘. Scroll down the list and add ‘Main Menu‘. This will add the apple icon on the left. You can now log out and shut down from the Apple dropdown menu (same as Mac OSX).

menubar-add-mainmenu

Next, we are going to install globalmenu so as to display the menubar for each application. In your terminal, (Updated: The globalmenu only works in 32bit machines.)

cd Mac_files

wget http://gnome2-globalmenu.googlecode.com/files/gnome-globalmenu-0.4-svn964.tar.gz

tar zxvf gnome-globalmenu-0.4-svn964.tar.gz

cd globalmenu

sudo dpkg -i *.deb

If you have any errors when installing the package, try

sudo dpkg -i –force-overwrite *.deb

If you are having some installation problems with the gnome-globalmenu-applet, try

sudo apt-get install -f

Once finished, right click on the top panel and select ‘Add to panel‘. Scroll down the list and add ‘Global Menu Applet‘.

menubar-add-globalmenu

You might not see anything initially. Log out and log in again, you should now see the menubar for each application showing on the panel.

If your globalmenu is of a different shade of grey from the rest of the panel (as shown in the image below), right click on any empty space on the panel and select ‘Properties‘. Go to Background tab and select ‘Background image’. Under the selection, go to /home/username/.themes/Mac4Lin_GTK_v0.4/gtk-2.0/Panel and select panel-bg.png. Click OK.

globalmenu-w-darkbg

Drag the globalmenu to the left just beside the Apple icon. Right click on the globalmenu and select ‘Preferences’. Tick the box beside ‘Display the title of the current application‘ and put maximum width 100. Select the font to be Lucida Grande Bold. Click Apply and OK. You should now have a desktop that resemble Mac Leopard.

globalmenu-preferences

menubar-with-globalmenu

Configuring the Login screen

Click on the Apple icon, go to System->Administration->Login Window. On the Local tab, click Add. Navigate to the path /filesystem/home/username/Mac_files/Mac4Lin_v0.4/GDM Theme and select the file Mac4Lin_GDM_v0.4.tar.gz. Check the box beside the newly installed theme to activate it.

install-login-screen

Underneath, there is a color selection field, select it and key in the number E5E5E5 into the color code field.

login-screen-color

Click Ok. Log out. You should see the login screen as the diagram below.

login-screen

Configure usplash screen

usplash is the screen that you see when your computer is booting up. We are going to change it to show the white apple screen. In your terminal,

sudo apt-get install startupmanager

Go to System->Administration->Start-Up Manager Go to Appearance tab. Click on the ‘Manage bootloader theme‘. Click Add and navigate to the file /filesystem/home/username/Mac_files/Mac4Lin_v0.4/GRUB Splash/appleblack.xpm.gz. Check the box “Use background image for bootloader menu” and select ‘appleblack”.

startupmanager-configuration

startupmanager-addtheme

Next, click “Manage usplash theme”. Click Add and add the file /filesystem/home/username/Mac_files/Mac4Lin_v0.4/USplash Theme/osx-splash.so. Click OK. Select OSX-splash from the dropdown box.

Now reboot. You should see the following images:

bootloader

usplash

Creating Dashboard effect

We will use a combination of screenlets and Compiz widget plugin to achieve the dashboard effect.

Install Screenlets

sudo apt-get install screenlets compizconfig-settings-manager

Go to System->Preferences->Advanced Desktop Effect Setting. On the Left, click on Desktop. On the right, put a check beside ‘Widget layer’

ccsm-widget-setting

Go to Accessories->Screenlets. Activate the widgets that you want to display. Right click on the widget and select ‘Properties’. Go to Options tab and select ‘Treat as widget’. Do this for all the widgets that you have activated.

screenlets-as-widget

You can now see your dashboard in action by pressing F9.

dashboard-effect

Done. You have completed the transformation of your Ubuntu desktop to Mac OSX Leopard.

Some screenshots:

ubuntu-leopard-screenshot-big

screenshot-w-stack


Read more...

Do it Easy with 125 Nautilus Scripts

A collection of 125 Nautilus scripts to simplify your Nautilus experience.

Open up a terminal:

cd ~/.gnome2/nautilus-scripts
wget http://g-scripts.sourceforge.net/nautilus-scripts.tar.gz

tar zxvf nautilus-scripts.tar.gz

And thats it!

A Few scripts "may" be outdated.


Read more...

Tuesday, July 22, 2008

Install Software and doesnt appears in Applications Menu?

Sometimes we install software and there is nothing after that in Applications, gnome needs install to show them, not anymore :)

after install if theres nothing in the Applications just enter in Terminal:

killall gnome-panel
Thats it! After that will be there:)


Read more...

Tuesday, July 15, 2008

Monitor CPU and Graphic Card temperatures with Applet

Open Terminal:

sudo apt-get install lm-sensors sensors-applet

Add the sensors applet to your desktop panel. Right click on an empty are of your panel, and choose Add to Panel.... Then choose the Hardware Sensors Monitor entry out of the list.


Read more...

Show the Computer, Home, and Trash desktop icons in GNOME

Open the Configuration Editor (Al+F2), by running the program gconf-editor.

Choose apps->nautilus->desktop.

Tick the box beside computer_icon_visible, home_icon_visible, and trash_icon_visible. The changes take effect immediately.

Check Your Desktop:)


Read more...

Monday, July 14, 2008

Best MSN Client Emesene!


One of the best alternative MSN client with clean interface is Emesene!

Is added on Hardy Repositories!!

just paste in terminal:

sudo apt-get install emesene
and enjoy!!!


Read more...

How to: Install The Google Gadgets in Ubuntu!


Google Gadget was only for Windows and Mac, now finnaly is for Linux.

Here is how we install them!


Open System->Administration->Software Sources->Third Party repo's

we add this

deb http://ppa.launchpad.net/googlegadgets/ubuntu hardy main
Reload Repos!!!

After that in Terminal :

sudo apt-get install google-gadgets
and we execute it

Press Alt-F2 and type in ggl-gtk

Thats it!!!

If you want to auto start google gadgets:

open sessions via System->Preferences->Sessions
Then click +Add and input the fields like this:
Name:Google Gadgets
Command Line:sleep 10 ; ggl-gtk
Click ok and then make sure its check marked to startup.


Read more...

How to : Install a brand new Dock with expandable menu's for Ubuntu Hardy Heron!


One of the Best Dock in ubuntu is cairo dock,

and here is how we install it!!!


We add the repository to System->Administration->Software Sources->Third Party Software->Add:

deb http://repository.cairo-dock.org/ubuntu gutsy cairo-dock
Click Reload.

Open up synaptic Package Manager:

System->Administration->Synaptic and search for cairo-dock and cairo-dock-plug-ins then click install.

Once Installed you can find and execute Cairo Dock via Applications->System Tools->Cairo Dock

You can check for plugins or addons Here

And Here is a Documentation

Enjoy!


Read more...

D4x- Download for X with Rapidshare Fix


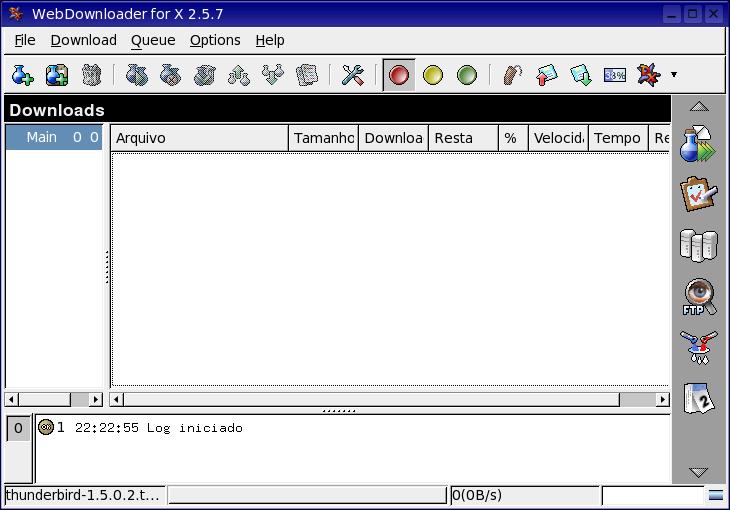
After the trick you can have latest d4x working with rapidshare fixed!


First we open Terminal

and then we install the latest d4x from ubuntu repositories

sudo apt-get install d4x

sudo apt-get install d4x-common


do not close terminal!

then we Download the patch

we extract the patch with right click -Extract Here-

then with terminal we go to the folder that we extract the patch and give

sudo sh rapidhack.sh


and we done!

enjoy full latest working D4X! the patch work with later version of d4x after update we execute only the patch!


Read more...

First Post

Welcome to my blog,

Here i will add tips & trips and how to for Ubuntu Linux!

Thanks


Read more...